 ( 090 ) 10-June-2014
The tail graft is made from Indian Rosewood, the same as the headstock, fretboard, and bridge.
for Mark R.
( 090 ) 10-June-2014
The tail graft is made from Indian Rosewood, the same as the headstock, fretboard, and bridge.
 ( 091 ) 10-June-2014
Gluing the tail graft in place.
 ( 092 ) 10-June-2014
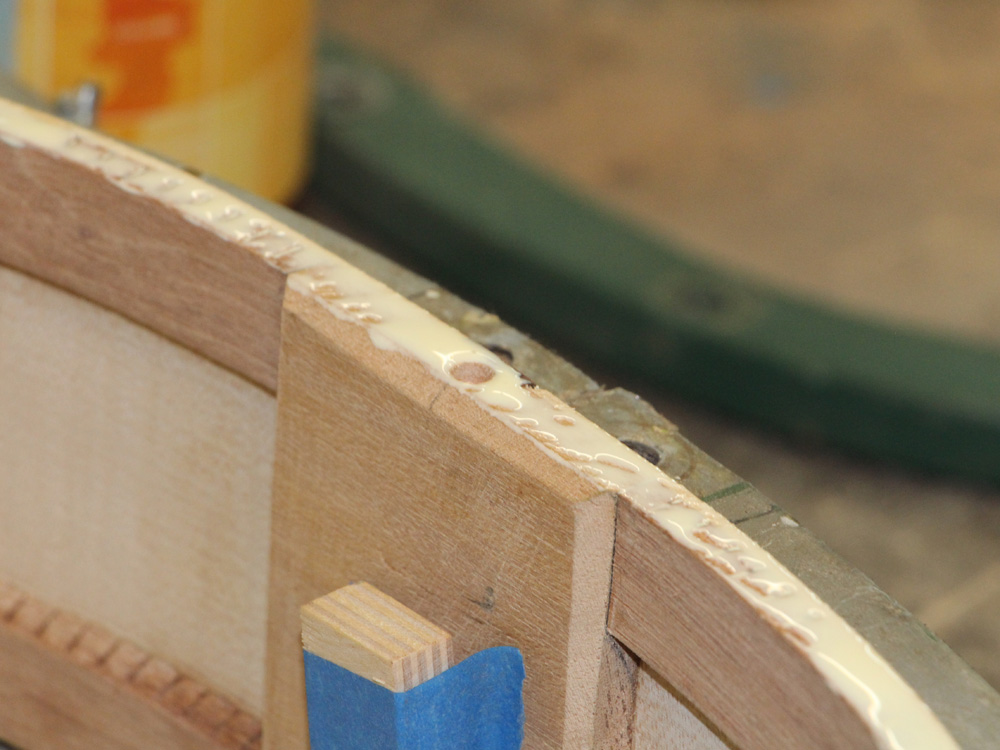
The heel channel holds the neck attachment/adjustment hardware.
 ( 093 ) 10-June-2014
These fiducial buttons are used to register the back on the rim when gluing them together.
 ( 094 ) 10-June-2014
When glue is wet is quite slippery, these buttons prevent the back from moving around as the glue sets up.
 ( 095 ) 10-June-2014
A bit of glue is applied to the edge of the rim.
 ( 096 ) 10-June-2014
Here you can see the holes that the fiducial buttons will drop into.
 ( 097 ) 10-June-2014
And the back is set down on the rim.
 ( 098 ) 10-June-2014
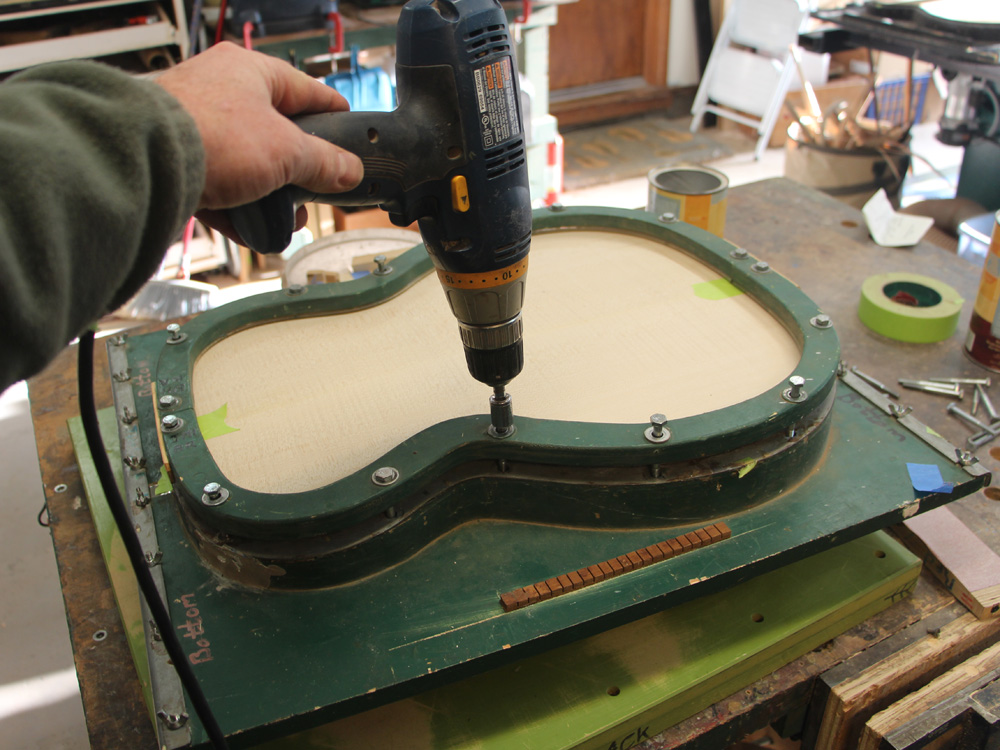
The flange is used to press the back onto the rim as the glue sets.
 ( 099 ) 10-June-2014
The glue squeeze out is easily cleaned up with out the top in place.
 ( 100 ) 10-June-2014
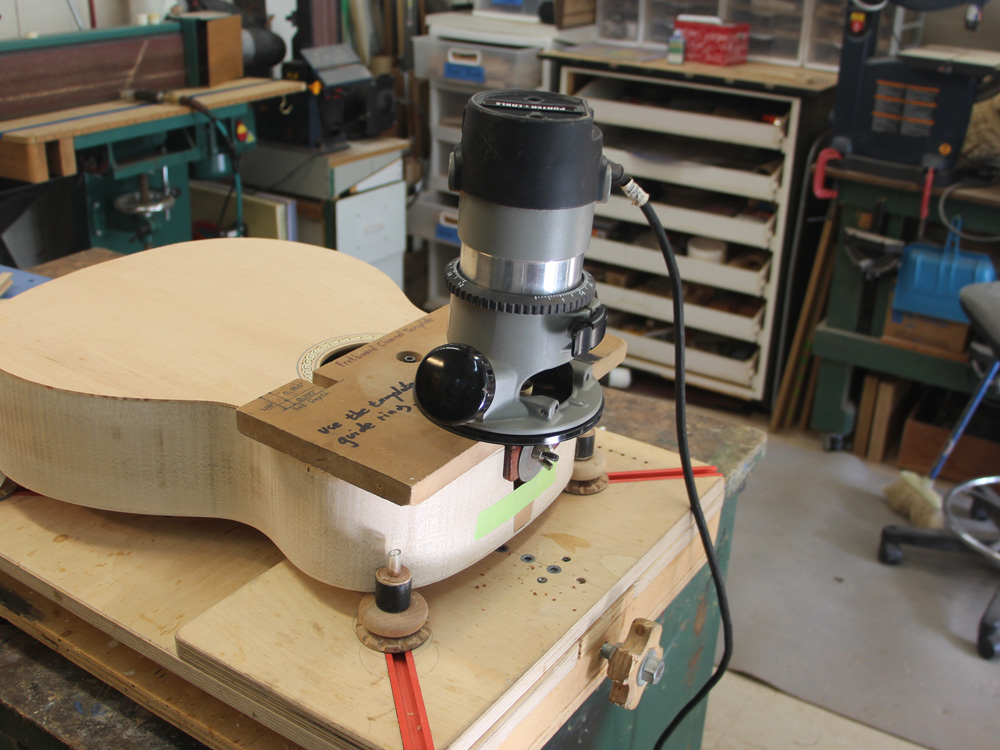
After the glue sets up over night I use a router to trim off the excess.
 ( 101 ) 10-June-2014
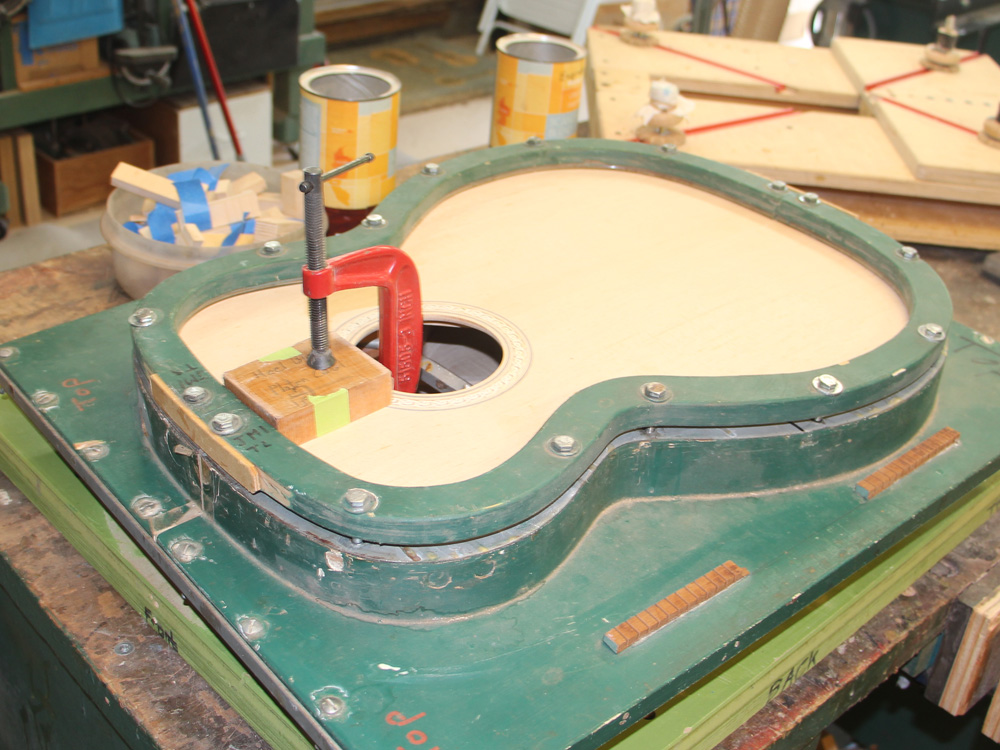
And then the top gets glued to the rim.
 ( 102 ) 10-June-2014
 ( 103 ) 10-June-2014
After the glue has set the assembly is removed from the form.
 ( 104 ) 10-June-2014
And the excess is routed off.
 ( 105 ) 10-June-2014
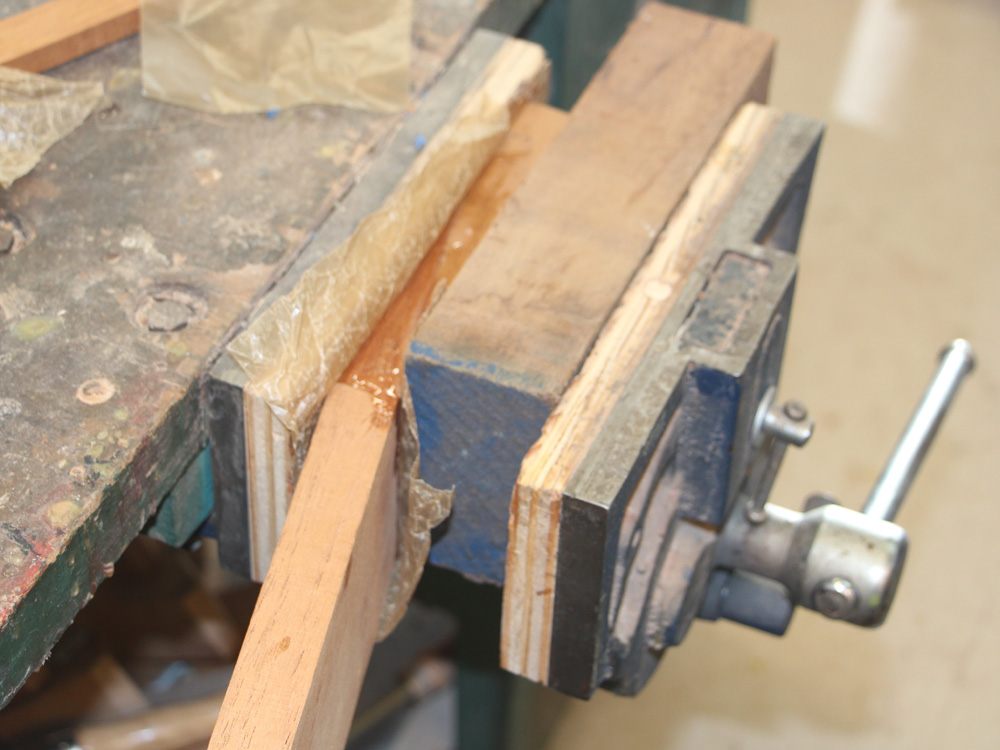
Now with the top and back glued to the rim I turn my attention the the neck. Here I am cutting various pieces from the neck blank.
 ( 106 ) 10-June-2014
I used my vice to press the sections of the heel together as the glue sets.
 ( 107 ) 10-June-2014
And the headstock gets glued together in the vice.
 ( 108 ) 10-June-2014
 ( 109 ) 10-June-2014
Back to the body to route out the fretboard cantilever support channel.
 ( 110 ) 10-June-2014
This template guides the router.
 ( 111 ) 10-June-2014
And I end up with a channel deep and wide enough to clear the cantilever support plate.
 ( 112 ) 10-June-2014
I use the router table to create a channel in the neck blank for the truss rod.
 ( 113 ) 10-June-2014
 ( 114 ) 10-June-2014
The belt sander is used to level the head stock.
 ( 115 ) 10-June-2014
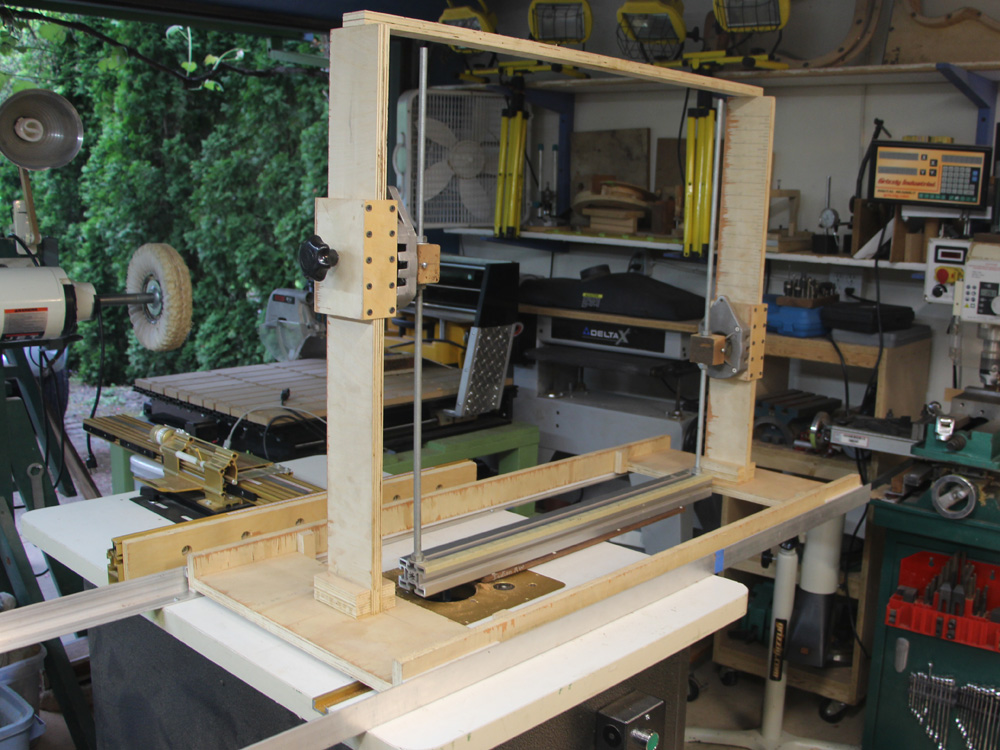
This machine is a dual length pendulum sled that sweeps the fretboard blank in a conical motion above the router bit. The result will be a compound radius fretboard.
 ( 116 ) 10-June-2014
The fretboard is swept over the router bit and then advanced on the sled. The dual length pendulum forces the cross bar to sweep out a section of a cone. I can set the machine to create a compound radiused fretboard of any dimension. In this case the fretboard will have a radius of 16 inches at the 12th fret, ~13 inches at the nut, and ~19 inches at the saddle.
 ( 117 ) 10-June-2014
I use a very flat sanding block to remove the tool marks from the fretboard blank.
 ( 118 ) 10-June-2014
And then I use a straight edge and feeler gauge to ensure the that the fretboard is straight along its length.
 ( 119 ) 10-June-2014
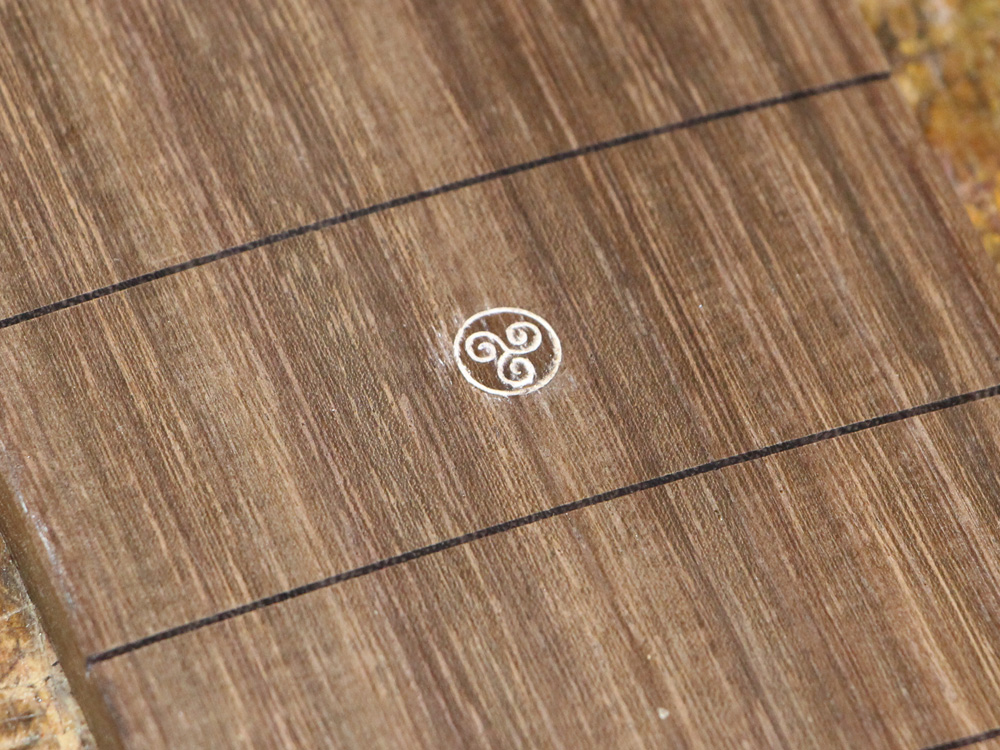
Here I am using my CNC machine with a cross cut saw attached to cut the fret slots in the fretboard.
 ( 120 ) 10-June-2014
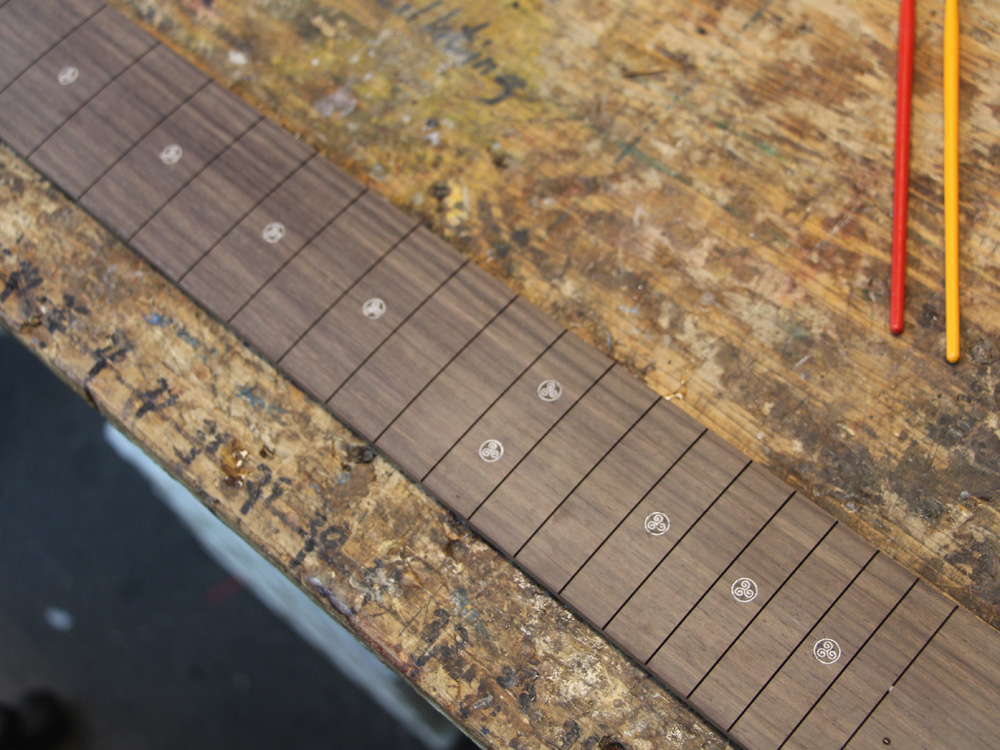
And then with a router attached I created the "Triskel" fretboard markers.
 ( 121 ) 10-June-2014
The routed markers are filled with paint.
 ( 122 ) 10-June-2014
Here is the result when everything is leveled
 ( 123 ) 10-June-2014
 ( 124 ) 10-June-2014
These are the tools I use to install the fretwire.
 ( 125 ) 10-June-2014
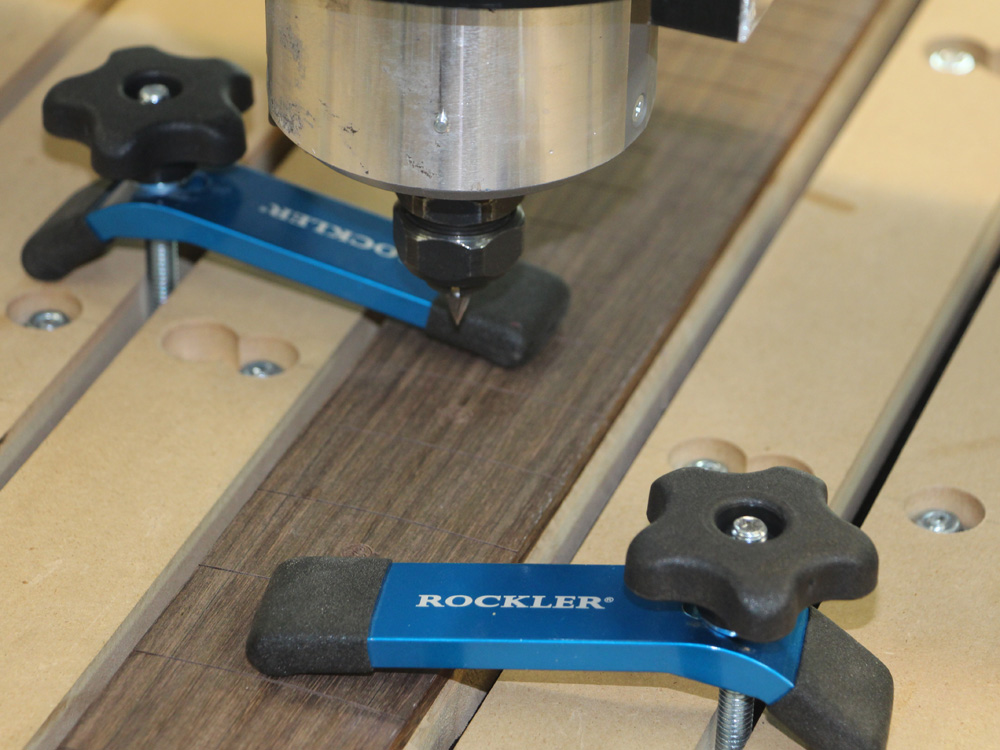
But first I want to reduce the thickness of the fretboard to 0.25 inches. I have taped two guide strips to the top of the fretboard and leveled them parallel to the back with the drum sander.
 ( 126 ) 10-June-2014
Then I flip the fretboard over and take material of of the back.
 ( 127 ) 10-June-2014
I use a special hammer to tap the fretwire into place.
 ( 128 ) 10-June-2014
And then a bit of glue is used to ensure they stay in place.
 ( 129 ) 10-June-2014
Now I use the milling machine to level the backside of the neck blank.
 ( 130 ) 10-June-2014
 ( 131 ) 10-June-2014
This insert is used to hold the neck to the body.
 ( 132 ) 10-June-2014
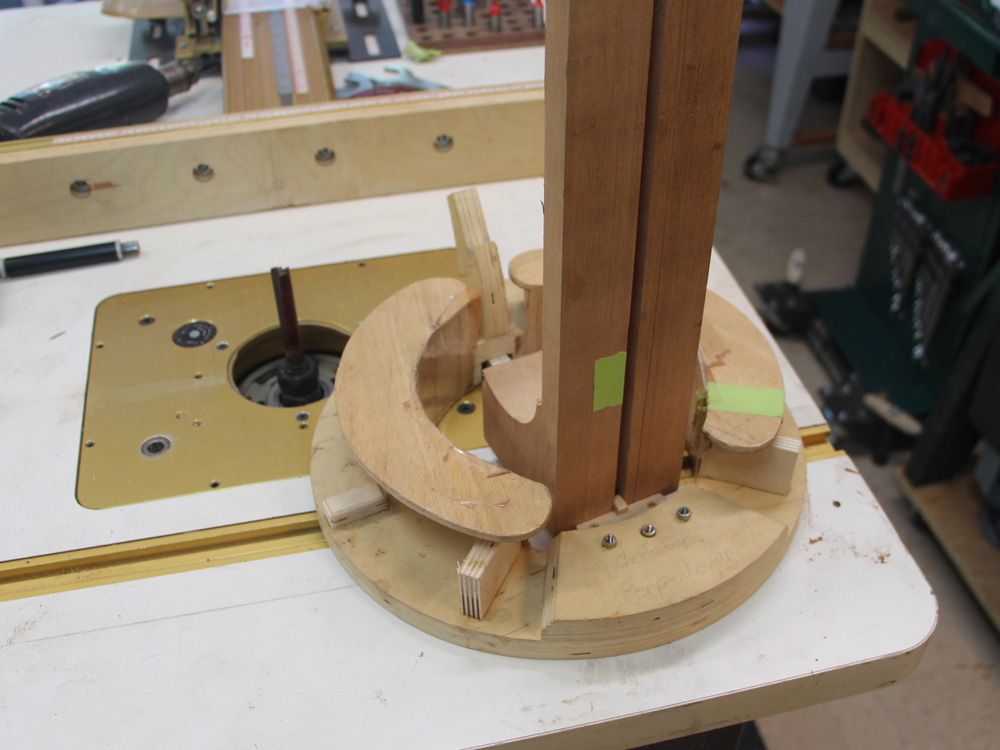
And then the neck blank is mounted on this template jig.
 ( 133 ) 10-June-2014
I use the router table to route the heel to the same shape as the heel channel in the body.
 ( 134 ) 10-June-2014
 ( 135 ) 10-June-2014
The heel will fit into the heel channel with a little room to spare.
 ( 136 ) 10-June-2014
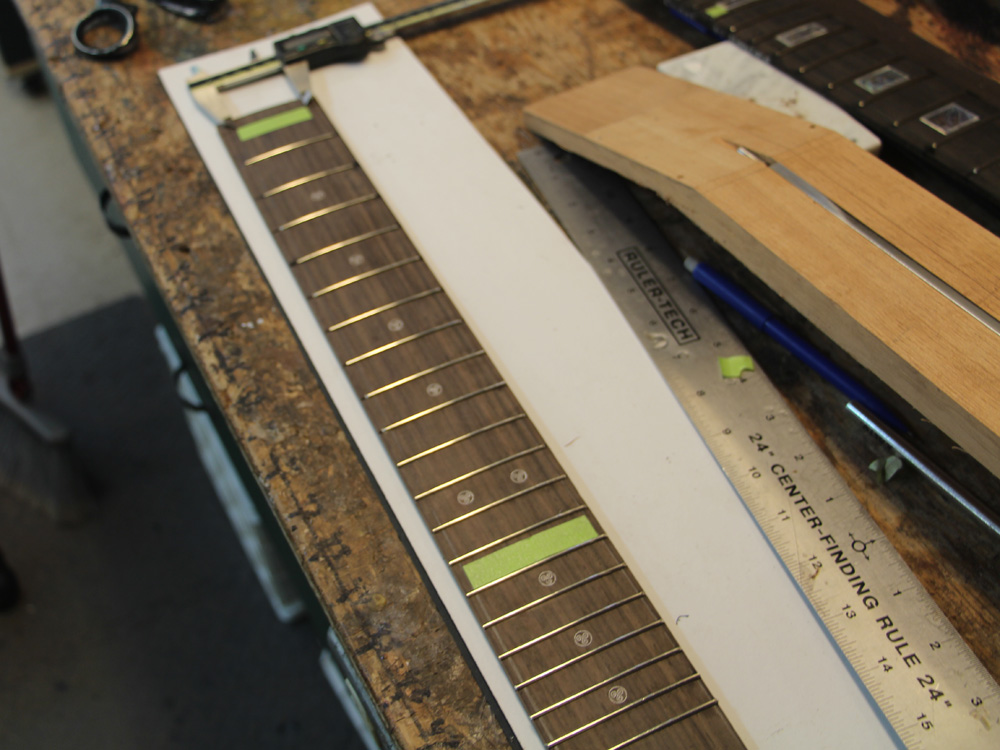
I use a bit of tape to mark the width of the fretboard.
 ( 137 ) 10-June-2014
I trim the majority of the excess off with the band saw.
 ( 138 ) 10-June-2014
And then I use the belt sander to trim the fretboard to the edge of the tape. When there is no wood showing between the edge of the tape and the sanding belt I know it is time to stop.
 ( 139 ) 10-June-2014
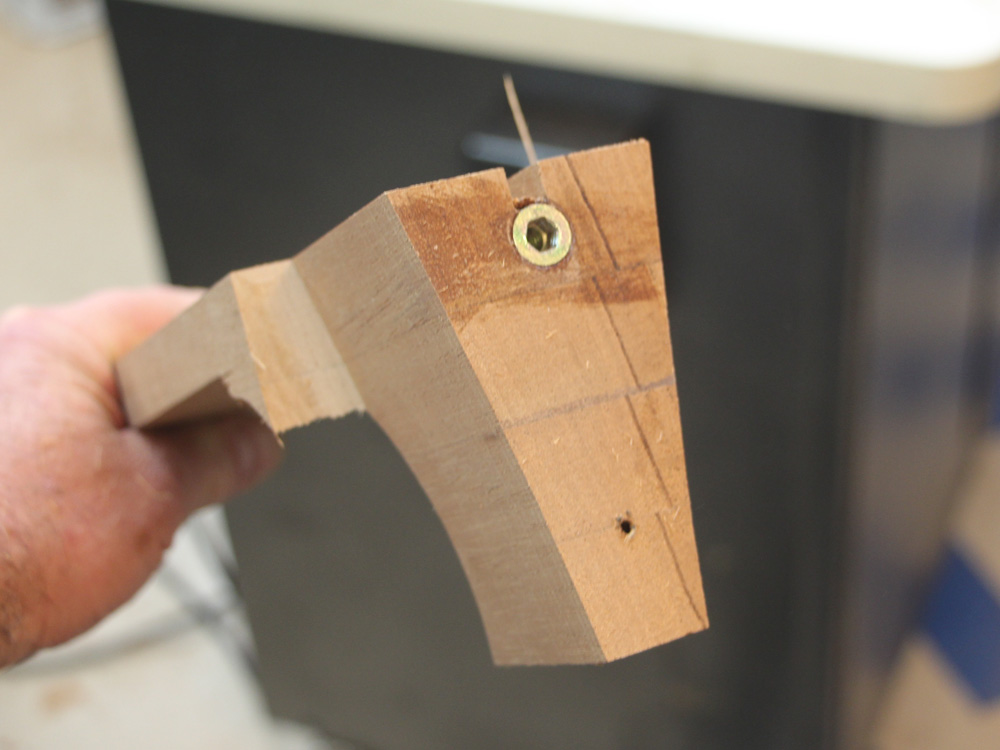
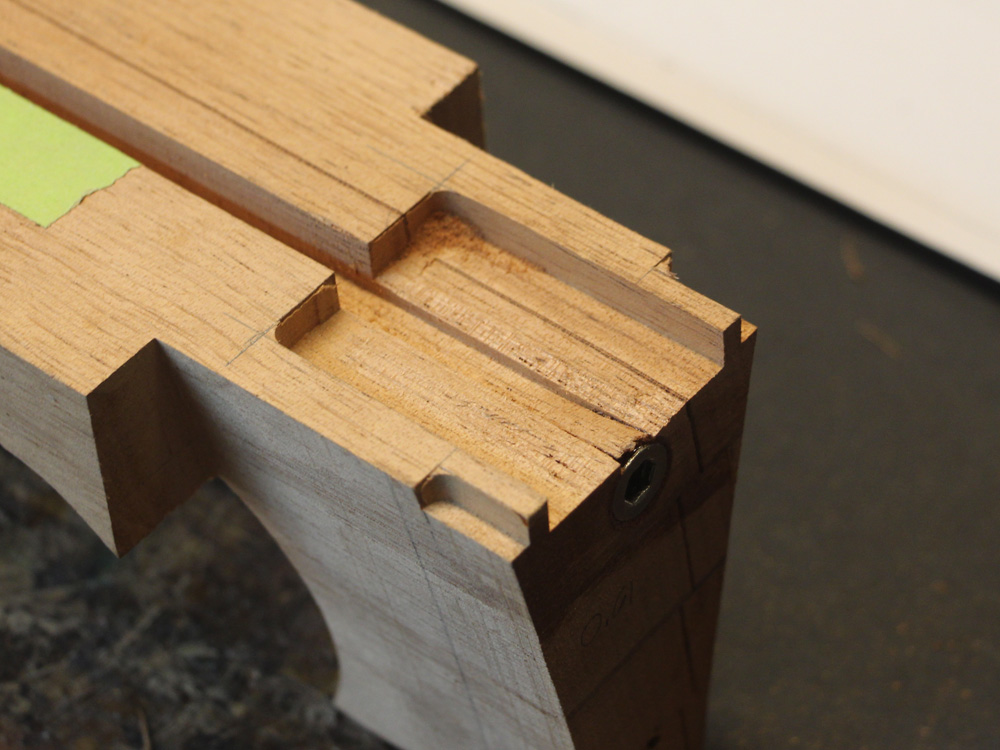
The milling machine is used to create the various channels in the heel end of the neck blank.
 ( 140 ) 10-June-2014
The center channel will hold the cantilever reinforcing plate. The outside channels slot into the "hiddy wings" on the body of the guitar. These wings will hide the seam between the neck and the body.
 ( 141 ) 10-June-2014
A slot is cut into the cantilever reinforcing plate for the truss rod.
 ( 142 ) 10-June-2014
A look at all of the parts.
 ( 143 ) 10-June-2014
Here I am lining up the fretboard on the neck blank.
 ( 144 ) 10-June-2014
And then I use my standard fiducial buttons to register the fretboard on the neck. Here I have put a drop of glue n the top of the button.
 ( 145 ) 10-June-2014
And then I place the fretboard in place.
 ( 146 ) 10-June-2014
And when the glue dries the button stick to the back of the fretboard. Now, when I glue the fretboard to the neck it won't slip around and I don't have to make any measurement or adjustments as the glue dries.
 ( 147 ) 10-June-2014
I have routed out a hole for the truss rod access.
 ( 148 ) 10-June-2014
And now am ready to glue the fretboard to the neck blank.
 ( 149 ) 10-June-2014
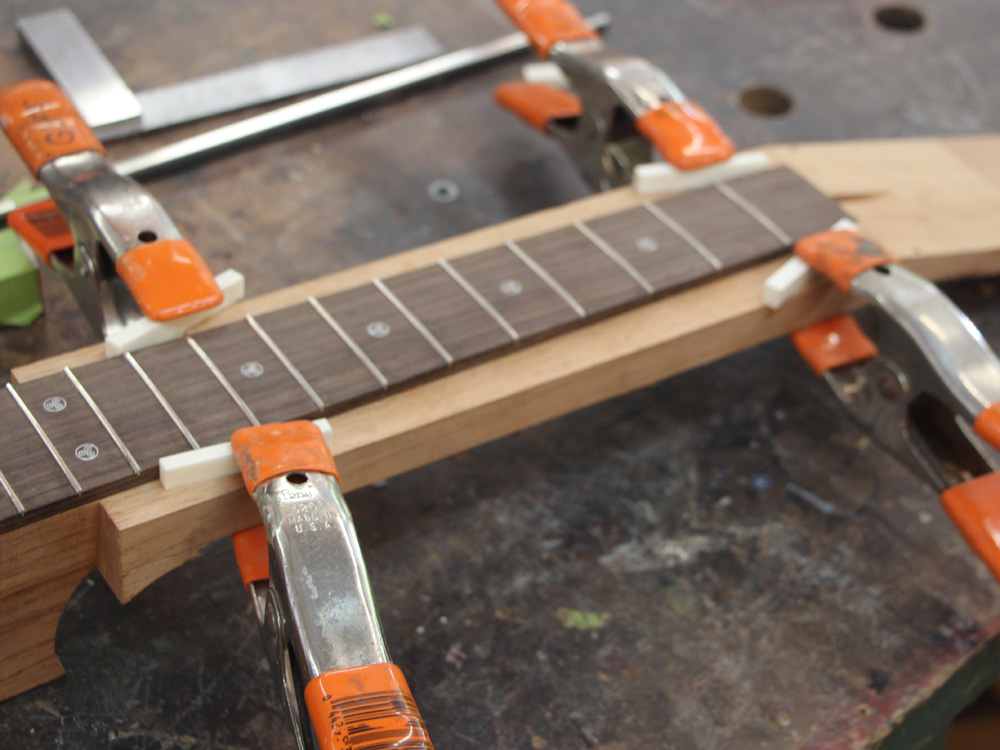
Lots of clamps are used to press the fretboard into place.
 ( 150 ) 10-June-2014
The next morning.
 ( 151 ) 10-June-2014
I need to drill a hole in the end of the heel for the adjustment hardware. I use a pointed setscrew in the adjustment insert.
 ( 152 ) 10-June-2014
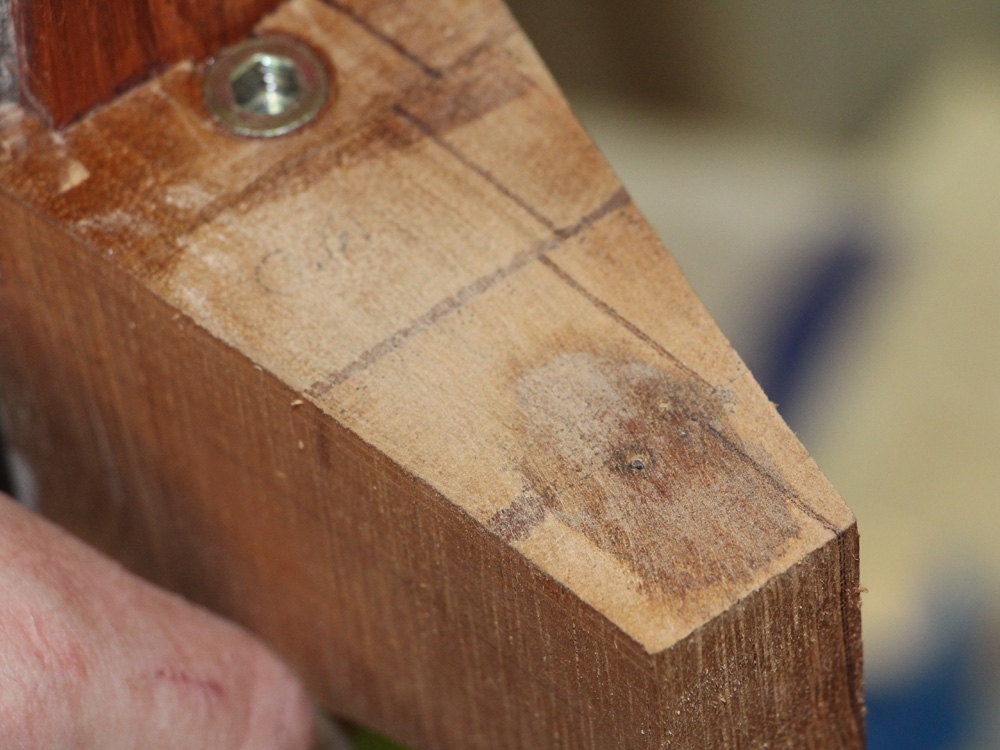
Then position the neck in place and press lightly.
 ( 153 ) 10-June-2014
The pointed setscrew leaves a hole where I need to drill.
 ( 154 ) 10-June-2014
First I trim the end of the heel with a 3 degree bevel. This ensures free motion of the heel in the channel
 ( 155 ) 10-June-2014
Then I use the milling machine drill the adjustment hardware hole.
 ( 156 ) 10-June-2014
 ( 157 ) 10-June-2014
Next I use a drill bit to drill a hole all the way through the heel which will allow a hex tool to access the adjustment bolt.
 ( 158 ) 10-June-2014
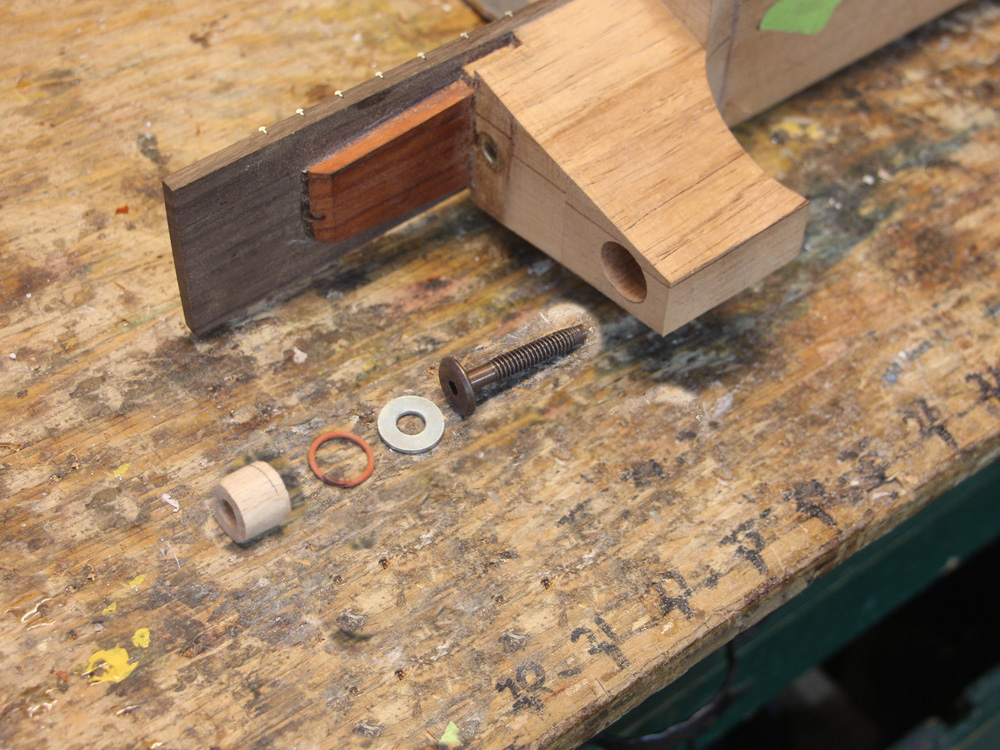
Here is the adjustment hardware. The O-ring provides a little bit of compression so the bolt will not rattle around.
 ( 159 ) 10-June-2014
The hardware installed with a hex wrench in the access hole.
 ( 160 ) 10-June-2014
Now I trim the excess off of the neck blank.
 ( 161 ) 10-June-2014
And it starts to look like a guitar.